Thrifty Cent

I'm a Gemini.  I'm not so sure I completely believe in all the astrological brew-ha-ha, but I do think there's something to be said for a belief system that resides in the international social subconscious.  Be it the moon's pull or a self-fulfilling prophecy, my Gemini-ness is most evident in my split personalities.  I'm not crazypants, but I do have two equal and opposite forces fighting tooth and nail with in me at all times:  I have expensive taste but I am cheap frugal. Luckily, I have cultivated other characteristics to assist in marginalizing the internal struggle:  I'm a superstar at haggling and I'm not so bad at fixing things up.  Here are 3 projects I've worked on in the last couple of weeks that have satisfied each twin that lives inside this little gemini:

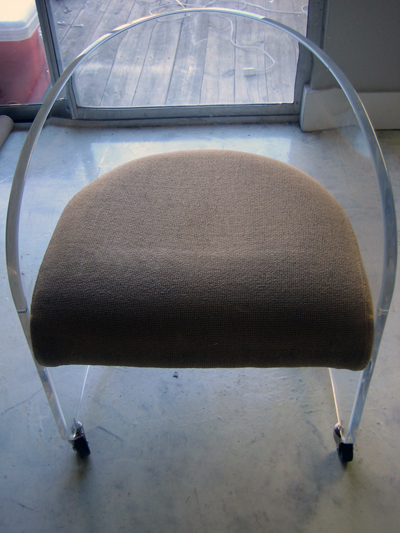
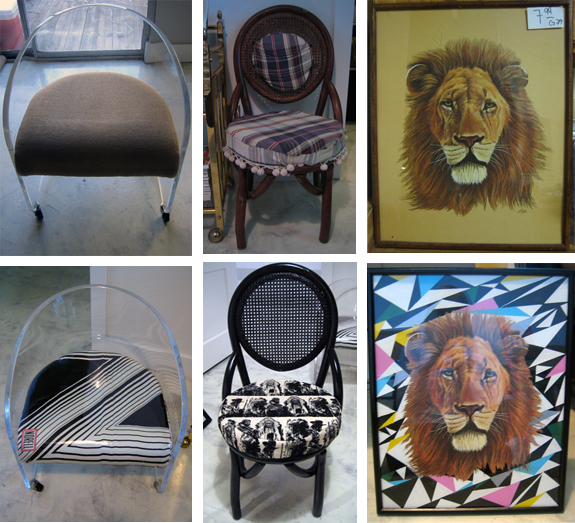
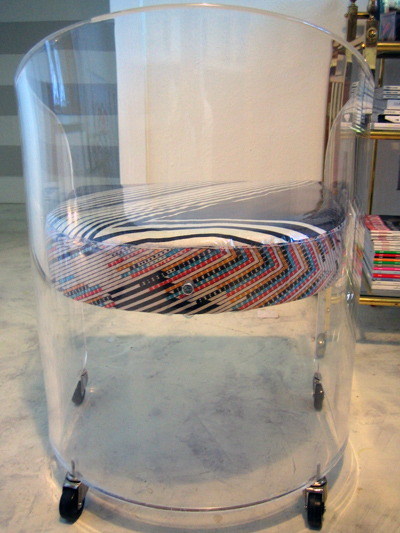
I found this lucite gem at the City Wide Garage Sale last weekend.  Normally I go when the best deals are to be had:  just before close on Sunday.  This time, I tried something different:  I went when the doors opened on Saturday and the, ahem, planets aligned and the gods presented me with this vintage lucite barrel chair.

The price was $130, which is approximately 13 times more than I like to spend on a chair, but my frugal side also knows a good deal when it sees one (similar chairs are going for $800 - $900 online).  I talked them down (of course) to $100 and hauled ass out of the convention center.

Now, don't be fooled by the quasi-good lighting.  That fabric is one thousand percent polyester and had enough dirt to fill a shallow grave.   I ripped it off post-haste.

After taking off the offending upholstery, I realized why the seat was so uncomfortable:  most of the rubber supports were rotten and torn to shreds.  I cut new ones and Matt stapled them on for me.  Look, I'm crafty, I can make things, but few people on this earth are strong enough to work the devil's hand-tool that is Matt's staple gun.  One half-clutch of the handle is enough to give you a life-long battle with carpal tunnel syndrome

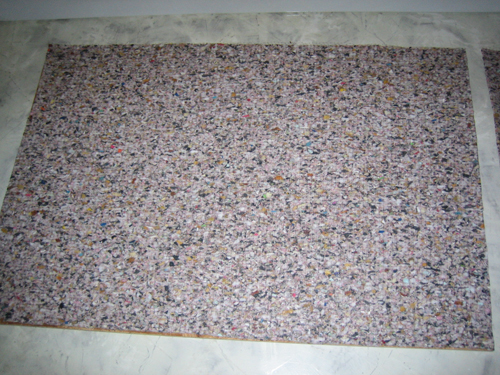
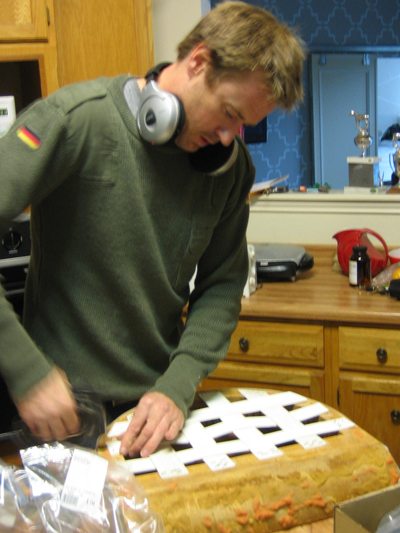
Once the internal repairs were complete it was time to spiff up the seat.  I chose to cover the seat with fabric cut from a vintage silk scarf that I had purchased at a City Wide Garage Sale several months ago for two whole dollars.

I then covered the scarf with clear vinyl.  I chose to use the vinyl for several reasons: 1.  Putting plastic on furniture is hilarious.  2.  I wanted to protect the scarf and 3.  I wanted to give the seat the same wow-pizzazz as it's lucite shell.  In person, it looks lovely together.

Because I didn't have enough fabric from scarf #1 to line the outer edge of the seat, I used fabric from a second scarf also purchased from the garage sale several months ago for $.99.  See, Erin, I do have a use for all the fabric I hoard.

Moving on to project #2

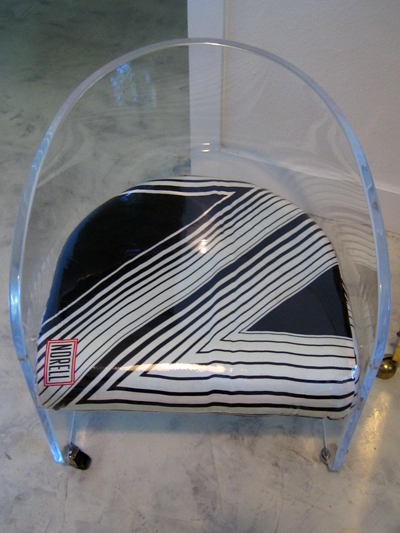
I bought this sad little excuse for a chair at a yard sale for $2 a year or so ago.  When I brought it home I could see Matt's little mind adding up the plausibility of filing for divorce.  I promised him glory and grandeur then the chair sat for months.   Now that my office is almost done (pictures coming soon, promise) I finally had a need for it at my sewing station.

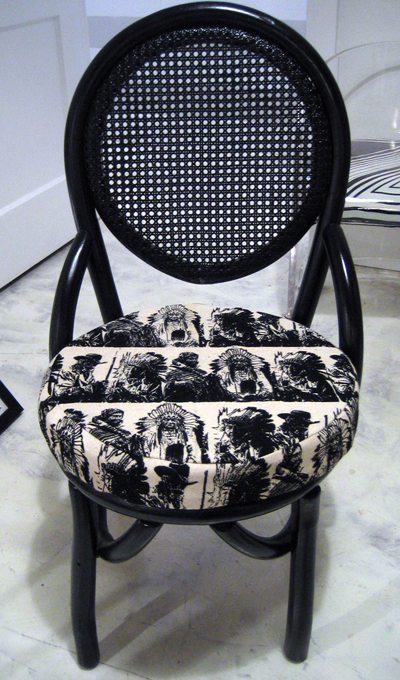
I painted it with high-gloss black spray paint, then recovered the seat with this awesome black and white Native American graphic print fabric I purchased when I lived in Albuquerque a gazillion years ago.  I'm almost positive that I got it off the $1/yard table.  I bought every last inch and have used it for several projects over the years, this is the first time it's appeared on an item for my home, though.

And finally, project #3

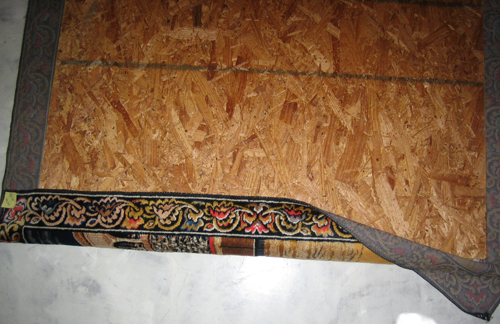
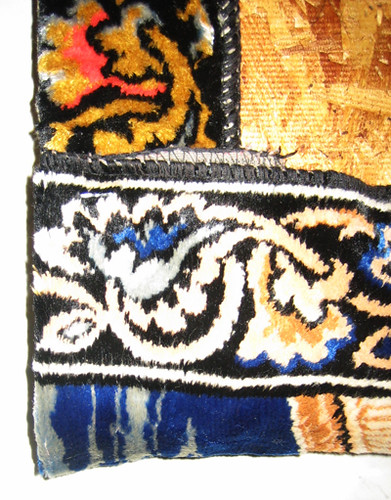
I bought this lame lion head print from the thrift store for $7.99.  It felt a bit steep for all that mucky beige art, but I had a plan and figured that, even if I failed, at least the frame was worth 3 times the price.

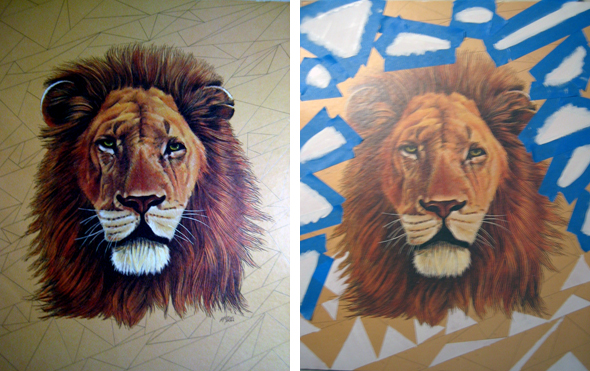
I used a straightedge to draw laser-light-show lines across the background, then taped off each area separately and painted as needed.  It should be noted that I originally planned to cut out the lion head and put him on a new background, but the print is mounted on thick cardboard and I wasn't sure I could cut it out cleanly.  The result?

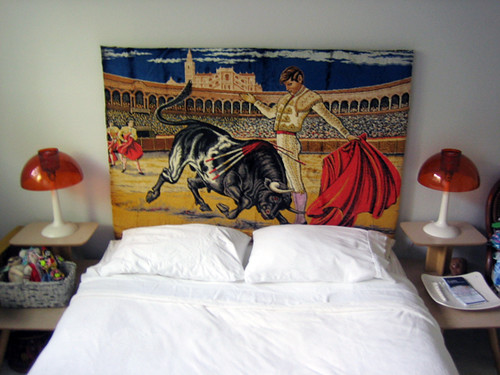
This little lion was relocated from depressingville to crazytown.  I think he likes it better there.  Oh, I painted the frame black, too.

All of these projects are living in my office now.  Here are all the before and afters together.  Are you starting to get a sense of the color scheme?

Finally, A How To: How to Make a Tapestry Headboard on the Cheap

Several months ago I saw the most insane headboard somewhere on the world wide web.  This evening my ego as a savvy internet searcher has taken a major blow, because, alas, I CAN NOT FIND THE DAMN PICTURE  TO SAVE MY LIFE.  But trust me when I tell you that it was phenomenal:  a big ole tacky tapestry depicting the Last Supper had been repurposed as a king-sized headboard.  While I didn't have a picture of the beast, it's image shined bright as the inspiration for the, ahem, How-To that I will show you kids today. Look!  Our fist How-To!  How sweet.  Since I don't have the original photo, here's a nice opening shot with another tapestry behind a bed (unfortunately, not as a headboard)

If you would like to have a tapestry behind your bed, but you want to crank it up a few notches, I suggest you follow these instructions: 

1. Scour the local thrift stores for a tapestry large and ferocious enough to do the trick (make sure it's at least a couple inches wider than the bed).  

I found some great tapestries on ebay here, here and here

Because I'm cheap and I love a bargain, I will brag that I got this 66" wide tapestry for only $19.  I'm better at finding deals than I am at taking pictures, so I apologize for the craptastic photos.

2.  Get yourself some plywood.  You'll want it to be the same width as the bed and about 8 inches shorter than your tapestry. Make sure it is thick enough to stay flat against the wall, but don't bother blowing your family's savings.  This $9 board did just fine

BONUS:  Have the dudes at the hardware store cut it to size for ya, it's free and saves you loads of time.

3.  Here's where the savings start rolling in:  Buy a small roll of carpet padding.  Every other site on the planet will tell you to use foam from the craft store but not here at Design Crisis, ut-uh, no way.  Were all about saving the Benjamins and this little pointer will cut your crafting costs by at least 75%.  Be sure there is enough square footage on the roll to cover your board twice.  

4.  Cut out 2 pieces of carpet foam the exact same size as your headboard.  If your roll won't make 2 exact pieces, you can use remnants from the first cut to cover the board a second time.

5.    Get yourself some spray adhesive.  WARNING:  Do not buy your adhesive at the craft store, it literally costs 4 times as much as the spray adhesive at the hardware store and isn't as strong.   

6.  Spray a 1 foot wide section of the wood, starting at the edge, fold your foam over and smooth it on to the board.  Work your way across the wood in 1 foot wide sections.  

7. Repeat for the second layer, spraying your adhesive onto the first layer of foam in 1 foot wide sections

8.  Have a sip of whatever cocktail you are enjoying

9.  I think I missed a photo or two during my craft session, but I think you can see what's happening here:  lay your tapestry face-down on the floor with the board face-down on top.  BE SURE TO CENTER IT

10.  Fold each edge over and staple one time on the center of each side, pull the fabric a bit as you go to make sure it's taught.

11.  Have a stapler party and finish stapling all the sides, working your way from the center out

12.  Be sure to fold your corners real pretty like.

13.  Find a boy to put some triangle hanger thingies on the back - 2 will work (make sure the screws are no longer than the thickness of your wood)

- sorry about asking for a boy to do it, I can weld, change the tires of my car and clean up cat vomit, but I don't use wood working tools - 

14. Hang, finish your cocktail, and enjoy

15. Continue enjoying while figuring out what to do with the rest of the room

This little project took about an hour and cost roughly $60.  Not too shabby.  Here are some other tapestry headboards for your viewing pleasure:

both images via vintage and chic

And I'd like to thank our friend, Andrea, for a heads up to these quaint little tapestry pieces:

Frederique Morre creates custom-covered home goods using recycled tapestries. What do you think, should I have 12 of those sofas in the room with my headboard?  Too much?

And finally, one last tapestry-over-something shot:

Suzy Hoodless

If I remember correctly, one of the DC New Year's resolutions was to start posting how-tos, I can't believe we actually did it but look, now you think we're good and honest girls.  With pretty headboards.