HOT TO: STAGING A ROOM FOR PHOTOGRAPHS

Lists are lazy, but it's Monday morning and I have a real job now.  Gone are the days when I could write novellas about redecorating David Bowie's Labyrinth. I may be busy making other people's spaces look pretty, but I still have a few tricks I can share to help your spaces look better too.  On the internet. Where it counts.

Let's do this.

1) Back up -- with your camera.

Vignettes (tight shots/detail shots) are easy to photograph because they don't require control over the entire room, but often there is not enough visual information to have narrative or emotional value. 

erin williamson design

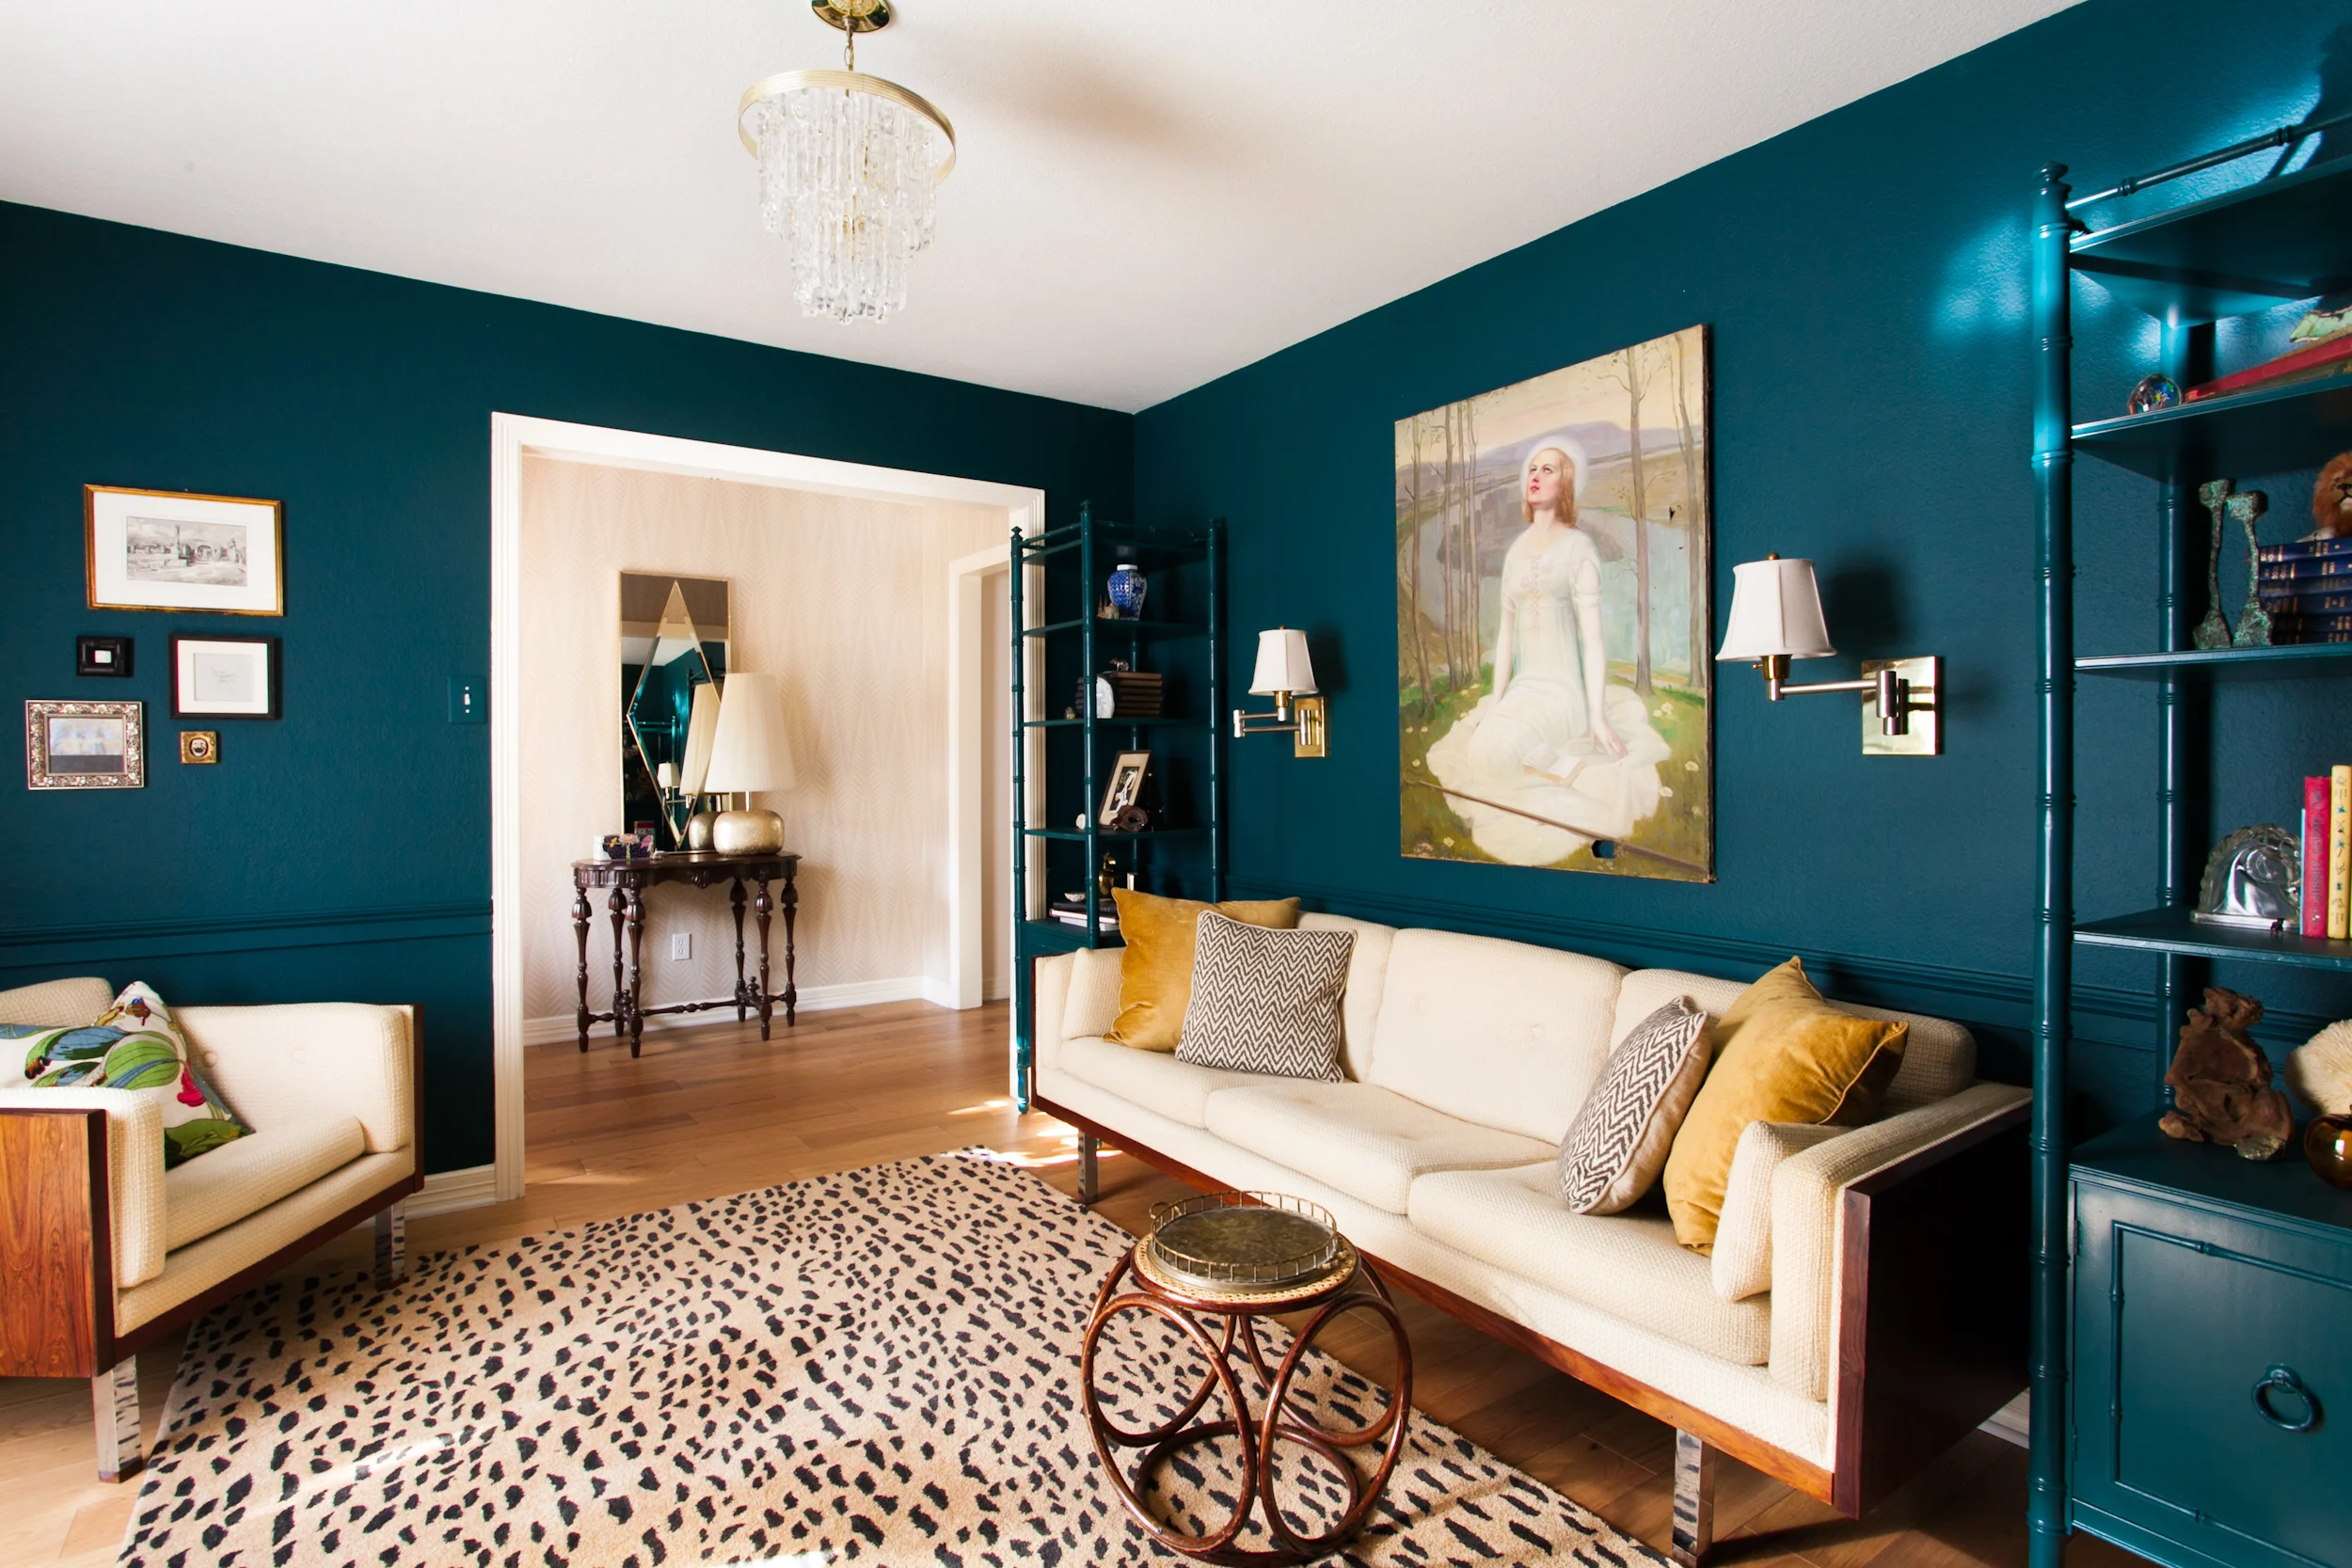
Magazine editors generally want an overview shot that shows most of the room and establishes a full setting to reference when they tell their story of the space.

erin williamson design

And pinterest loves a classic vertical shot that shows about 1/3 of the room, highlighting its most iconic features.

2) Build the space to suit the image.

erin williamson design

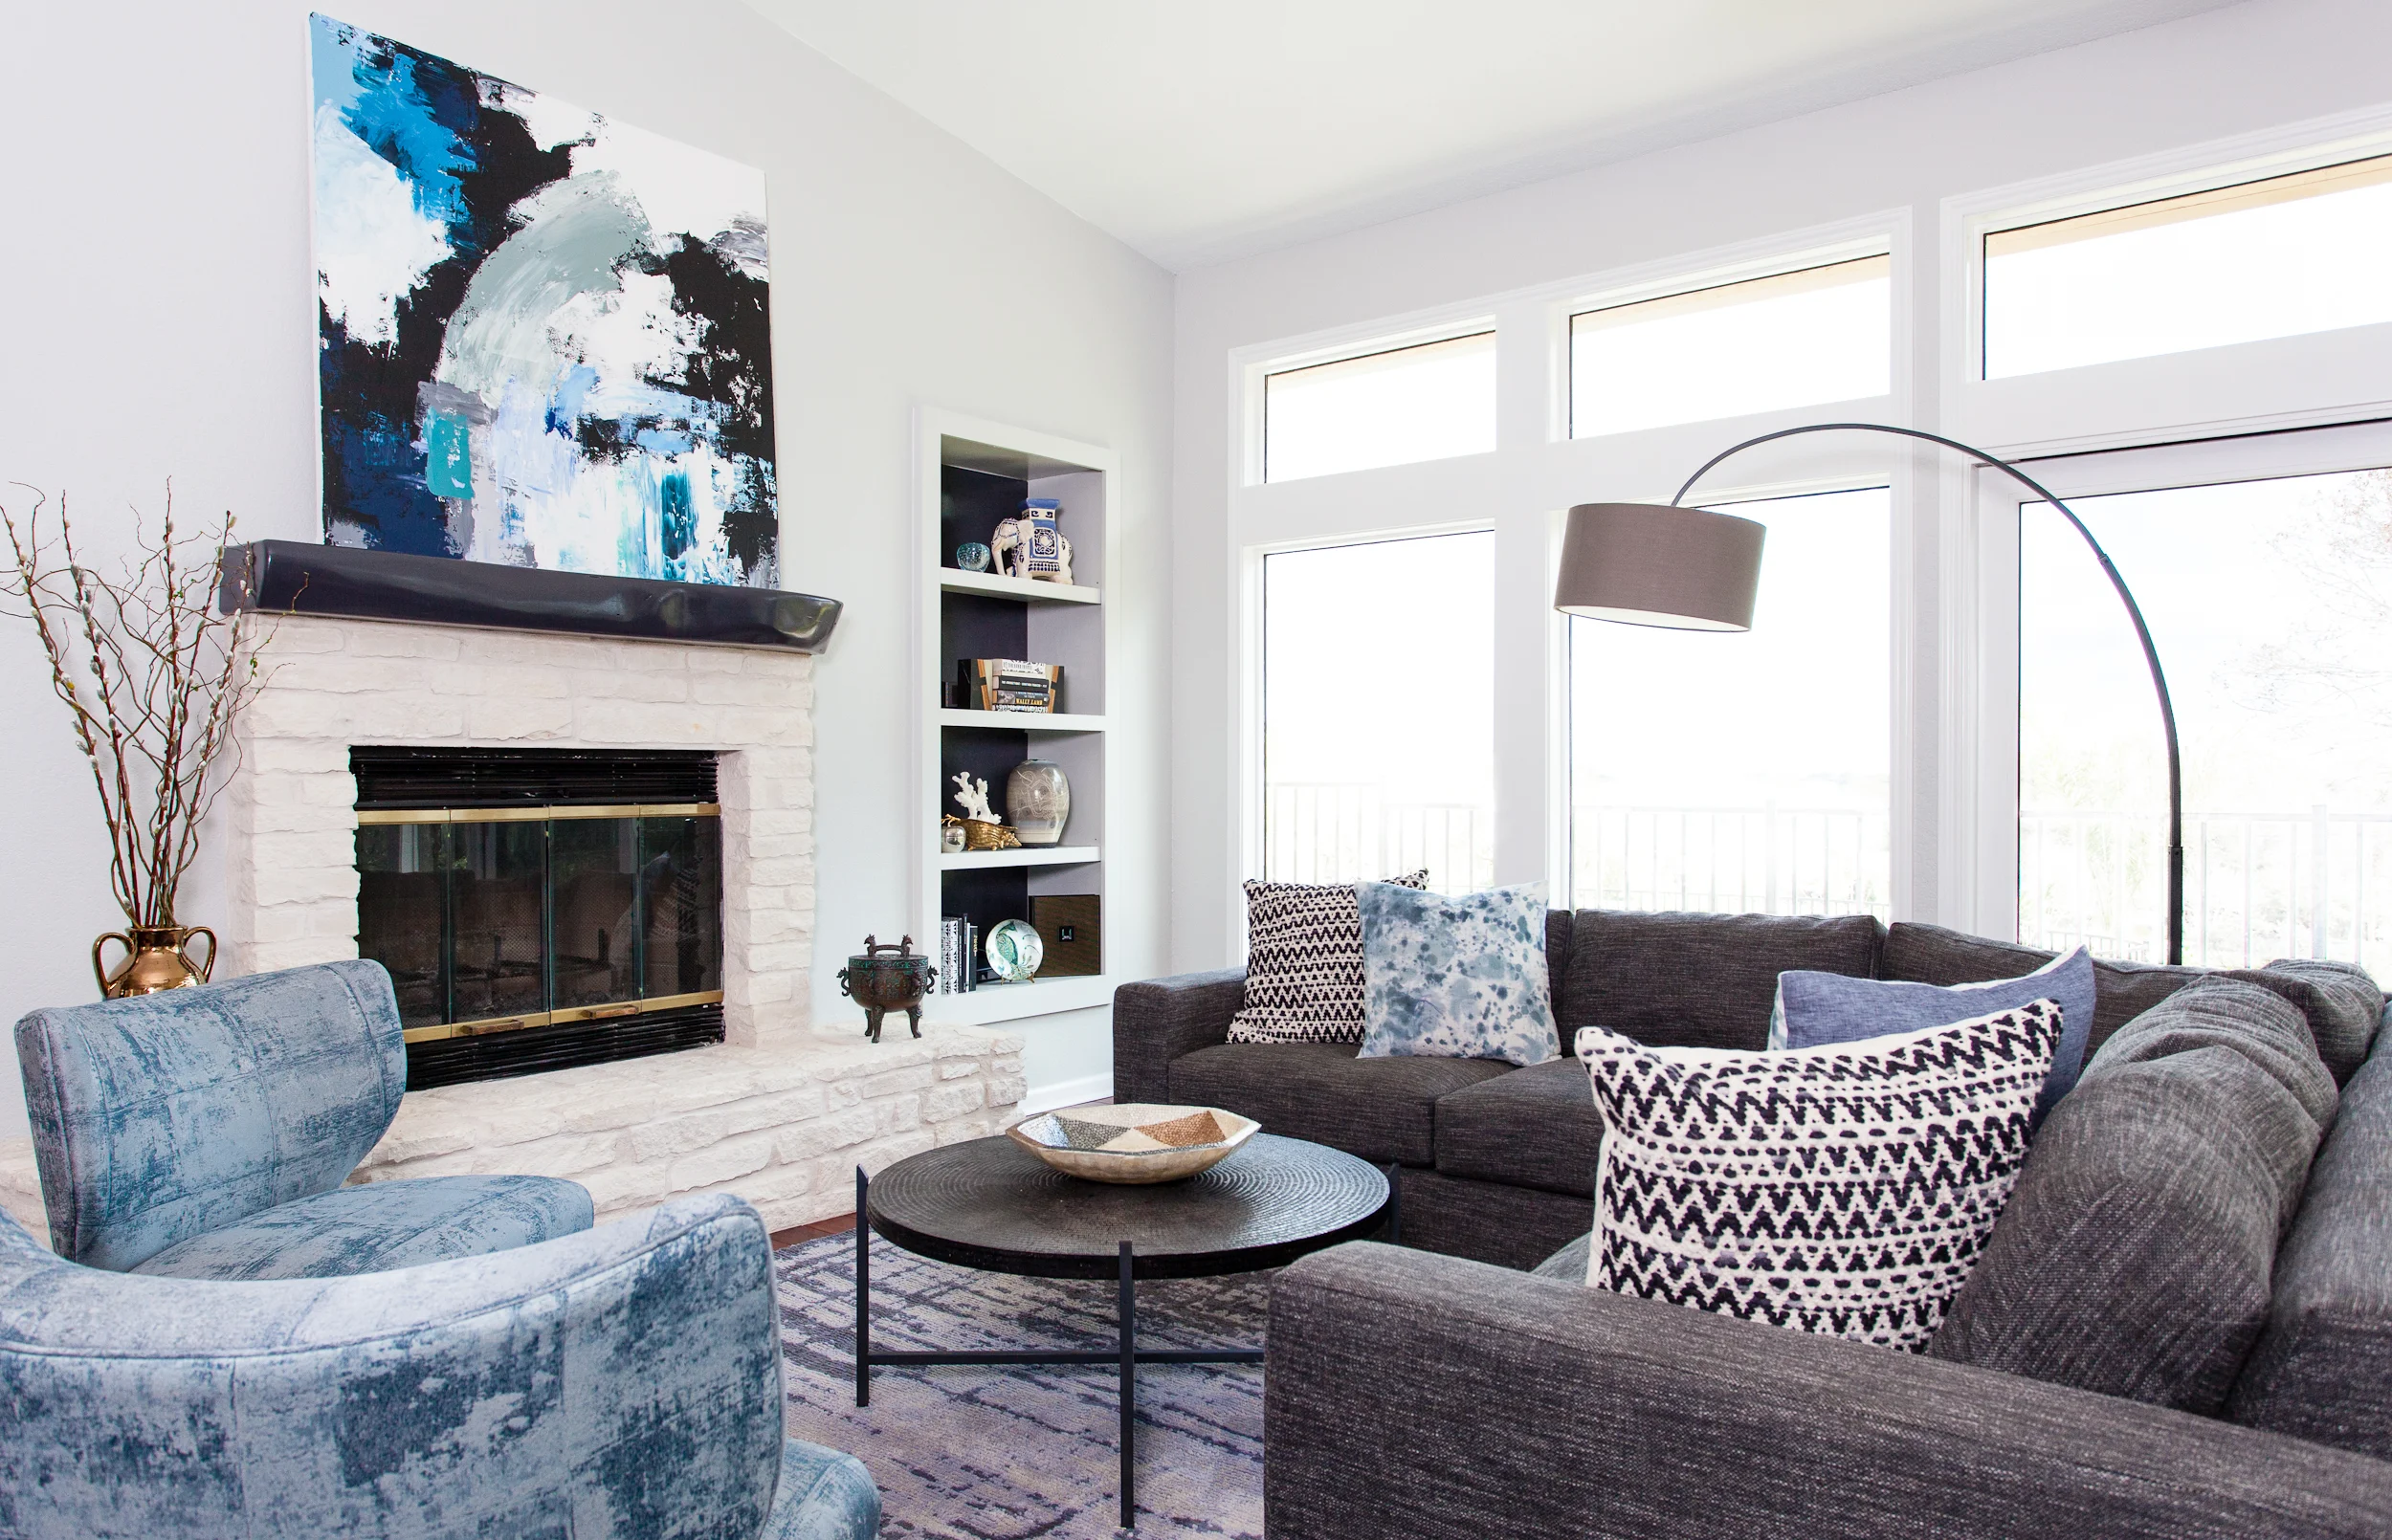
No matter how beautifully decorated the room, you need to move things around to showcase your focal point. This goes beyond adding pillows and flowers. I mean you have to muscle some furniture around so that it shows best in the image, not in real life. These chairs are completely out of plane if viewed straight on, but when viewed from at an angle they appear to be casually placed and everything leads toward the top third of the image.

Which brings me to the next tip:

3) Don't shoot directly into the back of furniture.

erin williamson design

This is huge, and occasionally you have to break this rule. But it's best to never shoot straight into the backs of furniture unless you have some super sexy back action happening. Allow your viewers to find an entry point into the frame by either standing to the side and shooting through the furniture arrangement, or moving chairs so that they are angled and do not block the field of view. 

4) Landscape the room with varying heights.

erin williamson design

You are basically constructing an architectural set, and if everything is at the same height the resulting image will read as Snoozeville USA. Make it dynamic by staggering heights of art, drapery, plants, furnishings, etc. across the room. Sometimes a change in camera angle will do the trick.

5) Get lower.

erin williamson design

Too much ceiling can kill a picture, plus don't you want to show off your swanky rug? Get used to squatting. Back up, use a wide angle lens, make sure you get enough of the floor, and then crop in when you edit the photos. Shooting to crop is not really best practice, but it's often a necessary evil unless you have a fancy perspective control lens. I don't.

6) Bookend your image.

erin williamson design

The eye travels, which is great as long as it's travelling inside your image. If you have lots of white space (like windows) at the edges of the frame, chances are eyeballs will keep on travelling... outside the frame. Try to edge the image with something slightly darker to keep the field of vision contained. It's like building a vignette around the frame, but better than using a cheesy filter. Oh, and if you have directional decor at the edge of the frame, position it so that it points inward.

7) Control your light. 

erin williamson design

For a while it was kind of in vogue to shoot with lamps on. Just don't do it. Shooting a light source is difficult and often doesn't read well. And sometimes when you are shooting into a window, it's ok to close the curtains. In fact, you can use them to filter and direct the light.

8) Flip pillows around so you don't shoot into blank fabric.

Stone Textile Design

Hide that plain white canvas you used on the backs of your $200/yd pillow fronts. If you are shooting a sofa or chair from an angle and the pillow back is showing, flip that sucker over. It will be our secret. (Design by the fabulous Stone Textile, from a shoot I did last year).

9) Clean up the clutter.

erin williamson design

Stuff multiplies X1000 under the microscopic glare of the camera. Do yourself and your viewers a favor by limiting accessories to only things that seem purposeful. 

10) Make the vignettes you shoot count.

erin williamson design

I don't shoot a lot of detail images, because frankly I think they are kind of boring and unlikely to be circulated -- for interior designers, anyway. So when I go in for a detail shot, I try to highlight something that might get lost in the bigger picture, like the pattern play between this upholstery fabric and rug.

And that, my friends, is it. We may not be solving all of the world's problems here, but it is important to show your hard work in the best light possible. Like, literally. So bust out your cameras and tripods and make that magic happen.

Please drop me a comment and let me know if this helps!

[All design work by Erin Williamson Design except image #8, all photographs by Erin Williamson ]
Where to Put Your TV

If you ask a decorator where to hang your tv, they will probably say nowhere. A tv is like an indoor ceiling fan -- an ugly necessity. Now I'm sure there are many among you who a) do not watch tv and can therefore ignore this problem and b) do not live in Texas and can therefore laugh at us poor suckers who would surely melt into flesh puddles without our fans. You guys pat yourselves on the collective back and go find something else to do. Maybe paint something? I'm not even going to touch the fan problem, for which there is no elegant solution. But I am going to post a few ideas that may help you tackle the tv conundrum. Buckle up, friends -- this may be the longest post you read all day. Perhaps even all year. But this is an important topic, right? Ok, maybe not peace on earth important.

First of all, the old rules say, "No tv over the fireplace." Speaking as someone who had a tv over the fireplace for a year or two, I think I can tell you why: it's too high. Optimum viewing height is at seated eye level. However, these days you can buy a swivel mount to tilt that puppy down for easier viewing.

Vicente Wolf

And then there is the actual fire issue. We didn't light up the fireplace the entire time the tv was mounted on it for fear of melting all that high dollar plastic into nickels and dimes. However -- in the interest of full disclosure -- we haven't used our fireplace since we moved it, either. Have I mentioned it's hot in Texas?

House Beautiful

See, this tv is way too high, but it does look nicely integrated into the design, what with the restrained palette and gallery wall. It is obviously the focal point of the room, but it shares and plays well with others.

How about that snakeskin surround? I have a feeling this fireplace is never used, so heat is a non issue. Also, every tv looks smarter when playing Fellini.

I think the bottom line regarding tvs over the fireplace is that it can be done, and well. But it's not as easy as just plunking your tv onto the mantel. The fireplace is often the heart of the room, so room design has to accommodate the tv's design, also. And most importantly, don't arrange all of your furniture to face the tv unless you want your living space to look like a stadium.

House to Home

How about just next to the fireplace? I know a number of people have chosen this option and generally the lack of symmetry bugs me -- but then I love symmetry.

steven volpe tv

Steven Volpe

But this is perfection. Boom. This room is so well balanced (asymmetrically). I appreciate that not every single piece of seating is turned to the tv, and the tension pole is such a simple, elegant solution that keeps the tv off the wall, thereby enhancing its 3D object quality. It's so much better than this:

Ralph Lauren's apartment

This looks like a high school AV cart. It's so very wrong.

Lonny

Built in solutions can be very attractive, from traditional and sophisticated to ultra mod.

OWI

Instead of hiding the tv away in an armoire (which I say should be avoided, because you aren't fooling anybody with that giant, hulking piece of furniture), a built in solution makes the tv an integral part of the room. The problem I see with this is that it's an expensive custom solution. Also, what if you decide to get a bigger tv? At least the Lonny image above leaves space for that possibility.

Lonny

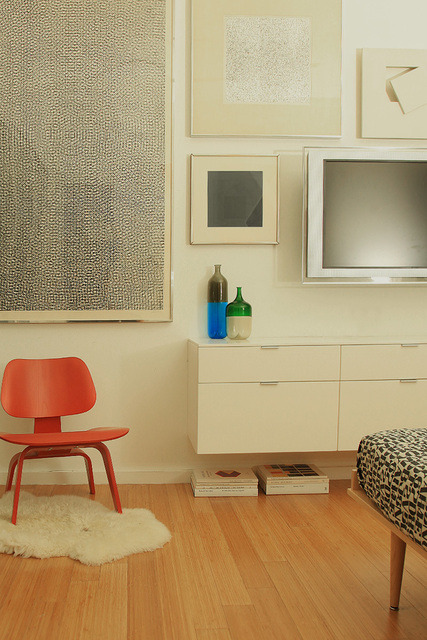
For us regular folk who can't afford built ins and choose to flat mount our tvs to the wall, the gallery wall can be an interesting possibility. I like that the paint color blends in with the black border of the tv, diminishing its visual footprint.

Brick House Tumblr

White walls + white tv + white art = a barely visible tv.

Sidenote: most tvs are black because black borders enhance the perception of contrast. Obviously they can be purchased in other finishes to blend into surroundings as in the above image, but you can expect to pay a premium for a fancy finish.

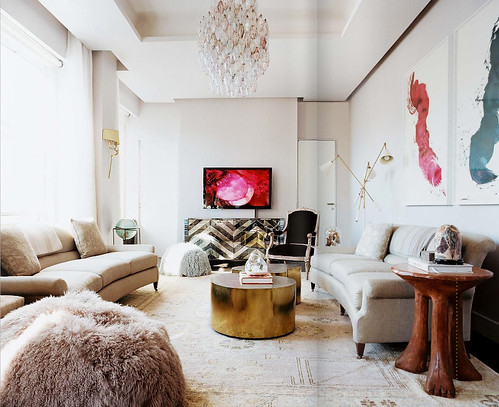
I suppose the most popular choice for a tv is over a credenza, which hides the cables and cords of modernity. Alex approves.

Laura Day

And of course it helps if you can position your tv over the most glorious credenza known to humankind, and then pause the tv to a color which matches your art perfectly. Again, I think the fact that not every piece of seating is turned toward the tv helps it to recede immensely.

Magnus Marding

But you can take that last piece of advice to the extreme.

For pretty much ever tvs have been the scourge of decorating. They have a restricted shape and palette, and formally speaking they often clash with furnishings. While I agree that it's best to avoid making tv the absolute focal point of a living space, that doesn't mean we have to hide our loves away. Unless you are a Mennonite or like to watch stupid reality tv on your iphone, you probably have a tv and it's got to go somewhere.

Marie Claire

Best learn to live with it gracefully.

Reader Help: Calling All Restoration Experts (That Means You)

My new virtual bud and soon to be Austinite Rosie just sent me an email brimming with urgency, and when I saw the item in question my head almost exploded. Check it:

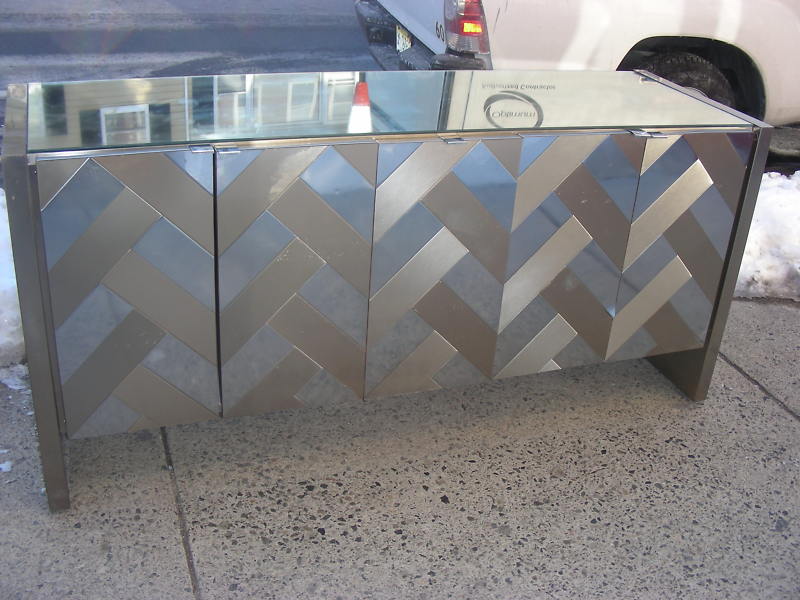
"Looking for some sound advice: I bought the attached chrome/mirrored sideboard on Ebay, and was chagrined to find that the seller left out some condition details: there's a light coating of hardened schmutz in various spots on the doors (Actually somewhat visible in the pic). I tried to scrape it off (bad idea) and am considering Goof-off, but am nervous about using it. Any other ideas?"

First of all, ZOMG! Did you really just buy that? Because I feel like it should belong to me...

It sure looks a lot like the mirrored credenza in one of my favorite rooms of all time, designed by Laura Day. I also feel like I have seen this beaut in another prominently featured interior, but I can't remember where... if you know what I'm prattling on about, send me a link and I'll post the pic. You will also receive my eternal gratitude for rescuing me from an Alzheimersish haze.

Ok, back to the matter at hand.

So I am having issues focusing on Rosie's request for help because I can't see through my angry tears of envy, but I'm going to try my best. First of all, do not scrape! The surface is fragile and can be scratched. Rosie says that the goo is mostly on the chrome parts, so she might have luck buffing it out with a balled up piece of foil, but I'm not an expert.

I know several of you out there have knowledge in this area, so if you know how to return this gorgeous hunk of bling to its pristine glory, let us know.

Meanwhile, I am going to try to figure out how to steal something for which there is no known location...

Rosie, maybe you better not move to Austin, after all.