One Room Challenge: Week Three -- Fables of the Reconstruction

Hello friends! Welcome back to the One Room Challenge, the crazy internet wide scramble to completely redecorate one room in six weeks. [Catch up on previous posts HERE.] I am struggling to wrap my head around the fact that we're now halfway through and I don't even have a mirror or lighting picked out... I'm feeling a bit like Aesop's hare here. We made super headway super fast, but now I'm super tired. At any moment I might lie down and twiddle some buckwheat whilst taunting tortoises with better project management skills than mine, but first we need to congratulate me on my hotdogging DIY skillz. At least the hare is flashy, right? erin williamson | design crisis

As you may recall I started out with a nuclear orange vanity of indeterminate but undeniably bad design. Well, I upgraded those sleazy doors for some fresh and clean oak shaker numbers from Barker Cabinets. I'll admit that I spent more than a few hours caressing them, getting to know every inch of virgin woodgrain. It was hard to slap on that first coat of stain. But after sanding them smooth with 150 grit paper, I screwed up my nerves and brushed on the Speedball india ink.

Yep. Speedball. India. Ink.

erin williamson | design crisis

Black as night, this stuff is. It makes regular "black" stain look like weak coffee, but if you try this for yourself please learn from my trials and four letter word filled tribulations: do not buy the acrylic ink (on left). The one on the right is what you want (PS, thanks for making the labels look so easy to differentiate, Speedball). It is waterproof and contains shellac, which is a sanding sealer so it doesn't raise the grain like the acrylic stuff. Also it flows ever so much more nicely and doesn't build up in tacky layers.

Can you tell that I spent a zillion hours reading woodworking lumber jock forums before I started this project because I am a giant nerd?

erin williamson | design crisis

Now I'm a dirty nerd in need of a manicure.

After permanently dyeing my skin black in the process of brushing on two coats of ink, I finished with Osmo polyx oil.

erin williamson | design crisis

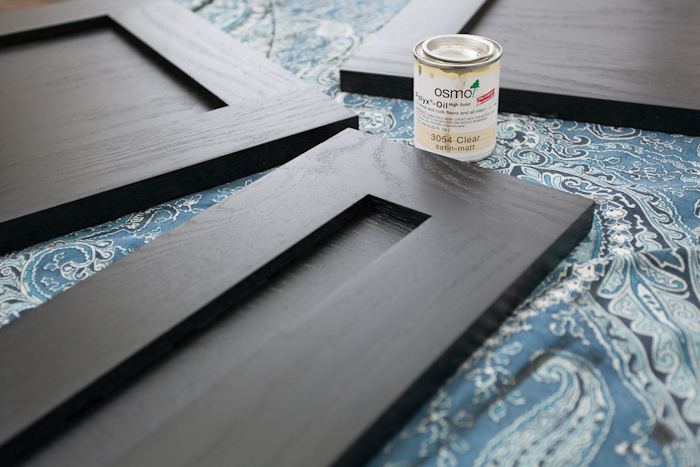
I kind of refused to hermetically seal my hard earned woodgrain with polyurethane, so I spent another brazillion hours researching finishing options before settling on a hybrid hard wax. This stuff is totally food safe and eco friendly, plus is it easy to apply -- wax on and wax off Ralph Macchio style. Repeat 8 hours later -- crane kick optional but not required. Voila! Delicious juicy woodgrain with a touchable oiled finish.

erin-williamson-orc-22

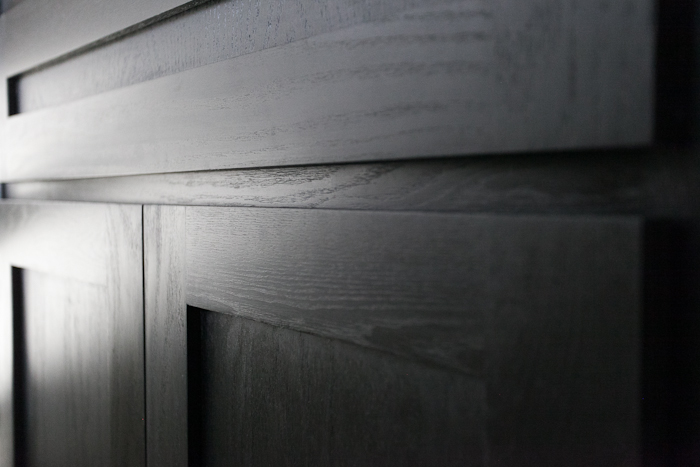
All that stripping, sanding, and staining, sublimated into one grace note of beauty. I hear angels singing and rainbows weeping with envy.

erin williamson | design crisis

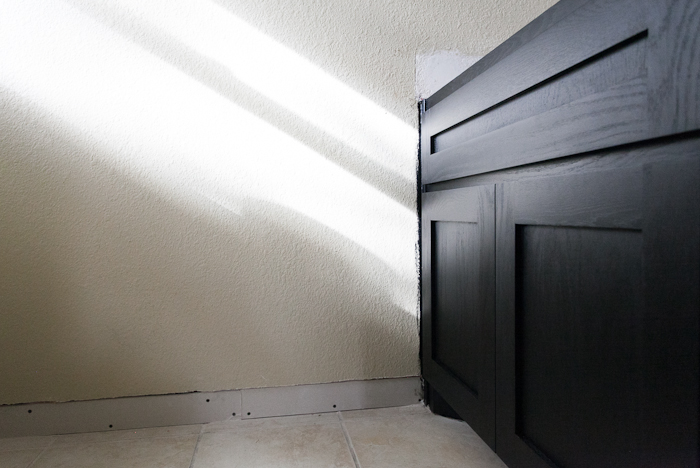
Rather than painting the cabinets black, I used this process as a test for our future kitchen remodel that will probably maybe never happen someday. I don't mind the idea of painted cabinets, but I do worry about chipping and the difficulty of touch ups -- especially with Wrecker and Bruiser around to hasten the demise of any fragile finish. This can be touched up and repaired with relative ease, plus I really like the ebonized look.

erin williamson | design crisis

Now whether this stuff will stand up to dribbled toothpaste and marathon boat parties hosted by our as of yet uninstalled sink, I do not know. This guy wants to remind me not to get too high and mighty on my champion DIY skills.

erin williamson | design crisis

He would also like to know if yogurt from the trash tastes as good as yogurt from the fridge.

erin williamson | design crisis

Because I said no I am not allowed to bask in the glory of my success.

erin williamson | design crisis

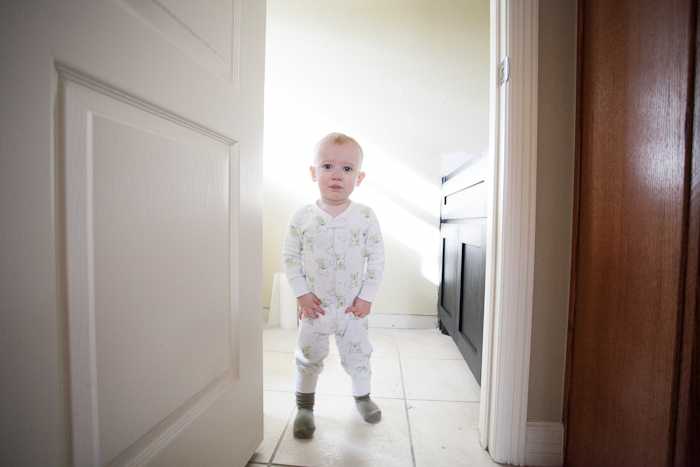
Unless I leave to forage for fresh yogurt, in which case I should come back. Now.

It's a wonder that anything gets done around here. But you may have noticed we managed to drop in an overhead light, positioned above the sink.

erin williamson | design crisis

Hilariously/not hilariously it is located exactly where an overhead light used to exist before the previous owners installed that hideous vanity light. We pretty much went back to the future. Or... something. Time travel confuses me.

erin williamson | design crisis

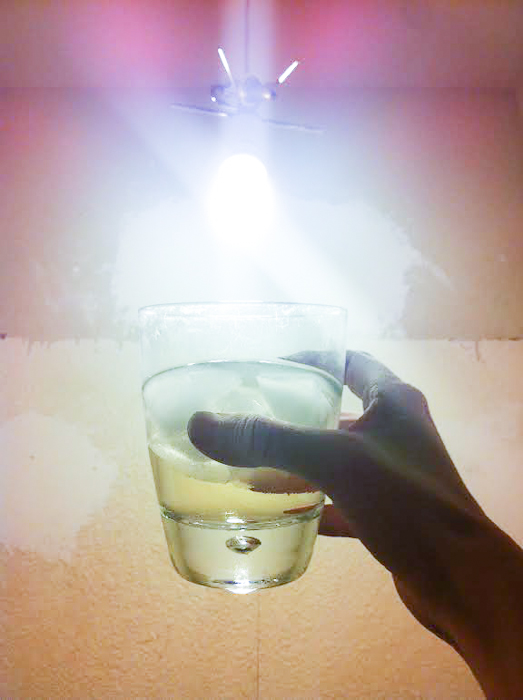
Light is helpful when you have to spackle and sand at pitch dark o'clock, which also happens to be renovation celebration o'clock. I like ice with my whine. Don't judge.

erin williamson | design crisis

To top off my winning streak, counters have been ordered and will be installed shortly. Ike picked them out -- or so he thinks. He also picked out the gargantuan face bandage which is covering precisely nothing. That's gonna hurt when it comes off, kid.

To summarize: I am basically king of the world, a super-ish parent with the very best that trash cans and stone yards have to offer, possibly the most talented DIY'er ever, and definitely a designer in charge of her own destiny.

Except that I had a hyperventilating panic attack and ordered totally DIFFERENT WALLPAPER. Bad hare, baaaad hare. From winning the race to cowering under a rock with my face in the dirt. Self saboteur in the extreme.

Goodbye beadboard, hello new wipeable wallpaper. We will discuss this ad infinitum next week. For now, just know how the mighty have fallen. I am in trouble.

Until then, please do see how my fellow participants are faring in their own race against time. Only three more weeks left to go!

Abby M. Interiors

Because it’s Awesome

Bijou & Boheme

Calling It Home

Chez V

Chinoiserie Chic

Copy Cat Chic

The Decorista

Design Crisis

Design Indulgence

Design Manifest

The English Room

The Glam Pad

Little Black Door

Mimosa Lane

My Notting Hill

The Pink Pagoda

Simple Details

My Sweet Savannah

Verandah House

House Tour: Jeff and Jason's Rustic Chic Retreat

And now dear friends, I bring you the last post of the year. Don't be sad -- we'll be back after all the booze has burned off, but I need a break (ok, I need a chance to get some projects done). Besides, you really won't care what I have to write after you see this incredible house tour, brought to you by Graham & Co bloggers (and generally cool people) Jeff Madalena, owner of fashion label/boutique Oak, and Jason Gnewikow, creative director at NY Design Studio Athletics. Jeff happened to leave a comment on my terrifying fireplace post, suggesting I take a page from his book and go clean and minimal a la his house. I think I cried a little after I followed the flickr link to his gallery, both because I was a smidge insanely jealous, but also because my faith in humanity has been restored. It is possible to finish things! Your house can look amazing!

MIRACLES CAN HAPPEN!

catskills house tour

Just check out that before and after! My fireplace is weeping tears of joy at the possibilities.

So without further ado, I bring you a Chriswanzmukkuh gift for the ages. From tiling to flooring, a ton of this was DIY. You (and more importantly I) can make things pretty, too. Let's do this!

Location: The Catskills, NY

Size: 2100 sq ft.

Time you’ve lived there: 3 Years

J&J: We found the home more or less by accident in early 2008 while visiting friends for a weekend in the Catskills. It had not been inhabited for quite some time and had been on the market for about 18 months. The house itself was not much to look at and was in need of a full gut renovation, but what really drew us to it was the sweeping views of the mountains. The renovation was done in three stages. We started by reconfiguring what was a kitchen, bathroom and sunporch into two bedrooms and a new bathroom. The second stage was incorporating the kitchen into the great-room to create an open concept kitchen/dining/living room. In the great room we raised the ceiling and clad them in pickled-pine wood planks. We also boxed in the original brick fireplace and had it refaced with concrete. The third stage was converting the old garage into a master bedroom with full a bath. We brought in reclaimed, unfinished barnwood floors and replaced the garage door with a floor to ceiling picture window and additional door to the patio outside.

great-room

The great room is definitely where we spend the most time. Lighting is a cluster of classic Nelson pendants, the sofa is the Long Life by Ihreborn from Scandinavian Grace. The big picture window in the background we designed to echo the shape of the adjacent hallway.

fireplace_straight-on

The refaced concrete fireplace.

fireplace_side-on

This is our Philodendron who is easy like Sunday morning. He doesn't need a whole lot of attention, just a front row seat at the window and a bit of water here and there. In the background is an odd chair we found at a garage sale that is sort of a mid century style love seat. We stripped it, pickled it and reupholstered the cushions in a geometric black and white Anni Albers print.

windowchair

This old chair has been dragged from apartment to apartment and here's the truth kids, she's from Macy's....yep,we said it..Macy's. We're not hating, she's cute.

kitchen

The kitchen is positioned at one end of the great room. We do a lot of entertaining in the Summer so this makes it easy for everyone to be in the same place and also provides easy access to the outdoors where we eat a lot. We used simple Ikea cabinets.

living and kitchen

Between the two of us and adobe illustrator, we were able to visualize most everything for our contractors. We didn't actually do anything too crazy -- really just moving walls here and there, so we spent a good bit of time figuring out what would work for us and then did very detailed (to scale) aerial drawings of the floor plans.

windows_table-merch

The table here is a 10 foot long farm table. We found the top at a barn sale and constructed the base out of reclaimed 4x4's. A host of bits and bobs live in frequent rotation at the end of the table.

bedrrom1

This was our main bedroom before completing work on the downstairs master. The bedrooms are all pretty modest in size. We embrace the low to high -- simple white bed linens and pillows from Ikea, throw pillows are Belgian linen Libeco from High Falls Mercantile, the wall hanging is actually a hammock we bought in Tulum, Mexico, and the print next to the bed is a Cy Twombly we bought in Paris.

bedroom2

The closet door in the second bedroom actually took us forever to find since we had to source the door after we had the framing done; we finally found it at a barn sale in Stone Ridge, NY. Light fixture is an industrial table lamp we found at the Brooklyn Flea Market. Bed linens and pillows again with the Ikea, the throws are the same Libeco Belgian linen from HFC. The print is a Joseph Albers from the 1972 Munich Olympics.

upstairs hall

This is the hall that connects the upstairs bedrooms and bath to the great room. We installed and finished a lot of the flooring and then stained the upstairs floors black using india ink for a true black. It's actually pretty simple -- india ink is super black, relatively cheap and surprisingly only needs to go on very thin. The only wrinkle we ran into was that we first tried to finish it with pure tung oil which didn't really work so we ended up using waterlox to finish it because we wanted a really matte finish. That stuff was kind of nasty odor wise. I think we're going to use osmocoat next time, which is supposed to be pretty odorless.  Windows in the hall and one wall of the living room were rehabbed factory windows.

upstairs-bath

The upstairs bathroom is a bit tricky to photograph. On the opposite side of the vanity wall is a open shower. The pillar wall shares all the plumbing for both the sink and shower. Sink basin is Duravit, fixture is an industrial wall mount from Chicago Faucets and the cabinet is from Robern.

downstairs-landing

We had to build up these downstairs floors as they had previously been a garage. We used reclaimed barnwood for the floors throughout. We did a lot of heavy black and white down here. The doors are some old store doors we found somewhere and painted black, of course. The photos in the background are by NYC artist Ellen Frances and were made for an Oak Gallery event.

downstairs_bath

The master bathroom houses a black bottomed clawfoot tub. A lot of the fixtures in this room were sourced from really random places. The tub fill is a brass spigot originally used for a laundry basin found on ebay. Subway tile on the walls and Carrara mosaic tile for the floors.

bedroom3_2

The master we converted from the garage is a pretty straight-forward minimal bedroom. We replaced what was originally a garage door with a floor to ceiling picture window. The throw is a charcoal grey, wool army blanket. Linens are Ikea.

bedroom3

This was our first renovation so the biggest challenge was bringing what we saw in our heads into reality, and communicating with contractors to bring that vision to life. The details are always the tricky things -- seeing how a window finishes against a wall or where moldings come together are the things you never really think about until you have to make a decision. The other big challenge is also the fun part -- sourcing and buying all the fixtures and furnishings. The style of the house is a mix of Scandinavian modern with touches of vintage industrial pieces, like steel factory windows sourced from a local architectural salvage yard. We are fortunate to have a handful of really talented NYC ex-pats that have established great interiors shops here in the Catskills, like Scandinavian Grace and High Falls Mercantile, so that makes shopping locally a bit easier. Renovating the house was a labor of love and and a real learning experience. Now that we're just about to embark on a new project in Brooklyn we're glad to have somewhere escape to on the weekends.

Thanks so much to Jeff and Jason for allowing us to scrutinize their beautiful home via the wonder of the internet! Rest assured I will be stalking this post during the holidays to read all your comments. I hope you enjoyed this tour as much as I did.

Happy Everything, homies! See you in 2012!